If, like us, you had installed redmine from source quite a long time ago and feel it would be soooo much easier and safer to have it running inside a docker container... this article is for you!
I actually have done the migration yesterday and I think this might help a bunch of people out there :-)
There are several reasons to dockerize a service such a redmine:
To do so, we are going to follow several steps:
To make this easier, you can find all the files used in the article in our github repository simple-docker-redmine:
https://github.com/abgotsunami/simple-docker-redmine
Or, alternatively, you can use the latest redmine official Dockerfile (here) and do it the hard way:
https://github.com/docker-library/redmine/blob/bcd0f77f268bb86dafd4afba0a0b36f478cf767f/3.0/Dockerfile
Once you have at least a Dockerfile, a docker-compose.yml and a docker-entrypoint.sh, you can start configuring and installing.
Follow the instruction from the README.md to create a database container. You will have to define your very own <root_psswd> and <redmine_psswd>, which are, respectively, the mySQL root password and the mySQL password for the redmine user.
If you were to install a shiny new redmine service, you just need to run:
$ docker-compose up -d
But, we have some more steps to go to recover our previously installed redmine.
First thing to do is to edit the Dockerfile to download the same version as your currently installed redmine. In our case 2.5.0.
So line 46 should be ENV REDMINE_VERSION 2.5.0 and line 48 should be commented (#). If you want to be very safe, you should look for the correct MD5 checksum for each version of the redmine tar.gz. I did not, I admit, so I just removed the md5sum test.
If you have a previous installation of redmine, you probably serve it via nginx or apache. If that is the case you have two options: stop the service and use the nginx container included in docker-compose.yml or remove the nginx section from docker-compose.yml and keep using your current service (nginx or apache). In the second case, you will also have to expose the port 3000. We will choose the second option because nginx on the host serves a dozen sites that I do not want to reconfigure (I am lazy guy). So the Dockerfile should look like that:
redmine:
  build: .
  links:
    - db:mysql
    - smtp:smtp
  ports:
    - 3000:3000

db:
  image: mysql
  volumes_from:
    - redminedbdata
  environment:
    - MYSQL_ROOT_PASSWORD=<root_psswd>
    - MYSQL_DATABASE=redmine
    - MYSQL_USER=redmine
    - MYSQL_PASSWORD=<redmine_psswd>

smtp:
  image: panubo/postfix
  ports:
    - 587:587
  environment:
    - MAILNAME=<mydomain>
From there, you can stop your current redmine and start the dockerized one. In our case, redmine was started using thin and supervisor but you probably have a different setup, so adapt the first line to your environment.
$ sudo supervisorctl stop redmine
$ docker-compose build
$ docker-compose up -d
docker_compose up will start 3 containers: redmine_redmine_1, redmine_db_1 and redmine_smtp_1 (use docker-compose ps to check).
Before going any further, check that you have access to your new redmine on http://mydomain. You might need to reconfigure and reload nginx or apache.
Create a backup from your current database (see instructions here). We have a mySQL database, so let's suppose we created a backup file called redmine_backup.sql.
We are going to copy it into our mysql container and ingest it:
$ docker cp redmine_backup.sql redmine_db_1:/
$ docker exec -ti redmine_db_1 /bin/bash
(redmine_db_1) $ mysql -u redmine -p redmine < /redmine_backup.sql
(redmine_db_1) $ rm /redmine_backup.sql
(redmine_db_1) $ exit
Then, we want to copy the files to the volume used by our redmine container as /usr/src/redmine/files:
$ docker inspect --format "{{ .Mounts }}" redmine_redmine_1
[{ <volume_path> /usr/src/redmine/files  rw true}]
$ cp -r <previous_redmine_path>/files/* <volume_path>
<volume_path> will look like /var/lib/docker/volumes/a605cdafa506563a0990bfa5ee7d5649575d3914590cd57a035d52a34b13532b/_data, and <previous_redmine_path> is probably /var/opt/redmine.
Once again, before going any further, check you have access to your redmine. This time, you should be able to connect as you did with the previous version and access to all projects, administration pages and so on.
Following instructions read on redmine official website, we are going to update redmine through each successive version, that is 2.6.0, 2.7.0, 3.0.0, 3.1.0 and 3.2.0. I think it should not have been necessary but it worked pretty well that way.
So, for each version, edit the Dockerfile so that line 46 matches the version and use:
$ docker-compose build
$ docker-compose up
Check your redmine is still working after each upgrade. When you reach 3.2.0 (or whatever is the latest version when you read this), you are done!
If an upgrade fails, just read the error message, try to connect to the container to read the logs or use --trace option wherever it can be useful to debug (for instance line 83 of docker-entrypoint.sh, migrations can fail).
This is the funny part of our simple-docker-redmine offer!
If you give a look at the Dockerfile, you will notice that we install plugins and themes. You can easily add any plugin and theme from a repository following the same method. Here is an exemple of what we did:
# install plugins
RUN git clone https://github.com/onozaty/redmine-parent-issue-filter.git parent_issue_filter && mv parent_issue_filter /usr/src/redmine/plugins/

COPY redmine/redmine_time_plugin.tar.gz /usr/src/redmine/plugins/

RUN tar xzf /usr/src/redmine/plugins/redmine_time_plugin.tar.gz -C /usr/src/redmine/plugins/ \
    && rm /usr/src/redmine/plugins/*.tar.gz

# install theme
RUN git clone https://github.com/Nitrino/flatly_light_redmine.git && mv flatly_light_redmine /usr/src/redmine/public/themes/oop
COPY redmine/themes/oop/stylesheets/ /usr/src/redmine/public/themes/oop/stylesheets/
COPY redmine/themes/oop/images/oop_logo.png /usr/src/redmine/public/themes/oop/images/oop_logo.png
First line simply clone a plugin and move it to the plugin directory.
Second and third line copy a plugin from the host, uncompress it and move it to the plugin directory.
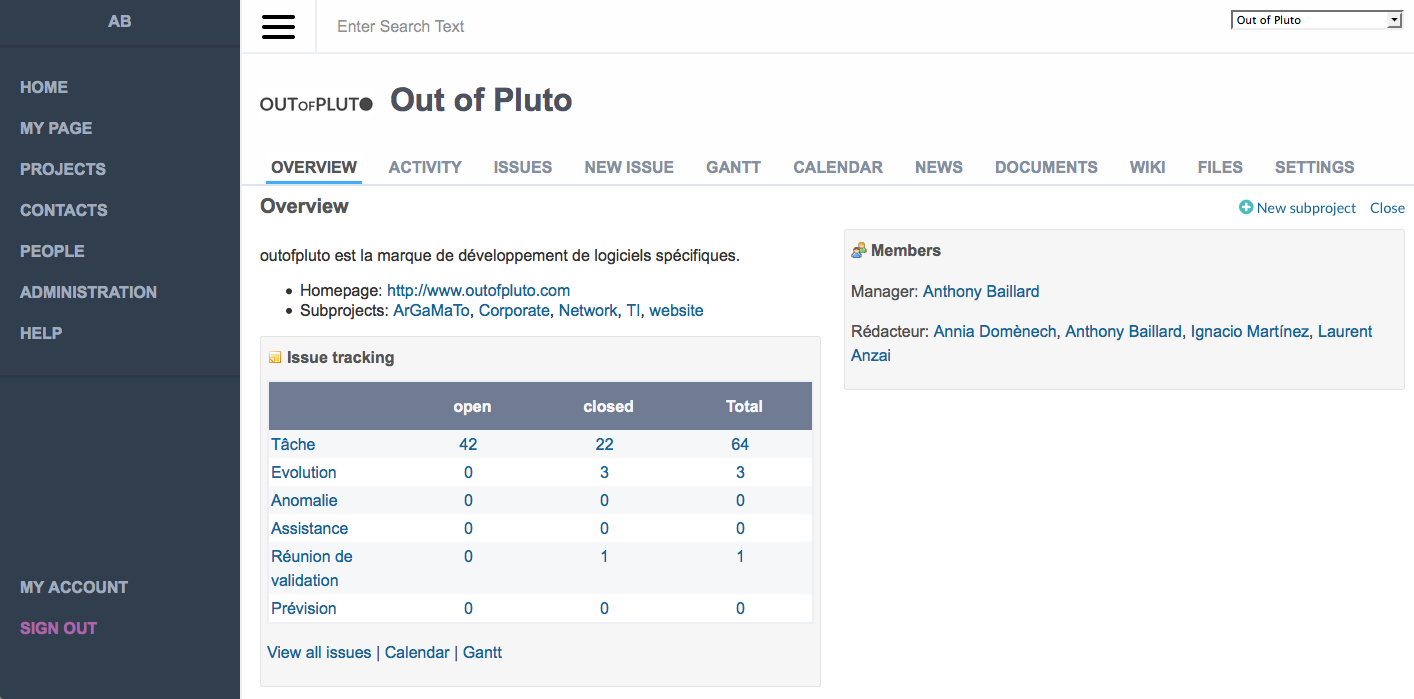
Three last lines clone a theme, move it to a theme directory and then copy some extra files from the host to make this theme a bit different. Here is the result:

In the repository, you will find some instructions to install a backup procedure from the MySQL container: cmds/redmine_mysqldump.sh.
Everything is explained in the file, but briefly you just need to copy this file to /usr/local/sbin, create a file containing the MySQL password, secure the file and add a cronjob to run it at the desired frequency.
Thanks for having read this. I hope you now have a nice dockerized redmine!
If some steps are unclear to you, or you detect an error, or you have any question/suggestion, please feel free to add a comment to this article!
Commentaires
Pas de commentaires actuellement
Nouveau commentaire